1️⃣ Background
While some people choose to distribute their Go programs as pre-compiled binaries, tools written in Go can also be built from source and installed into your Go work‐space via the go install command.
Go’s method for publishing code is a bit different than most other languages. Go developers don’t rely on a centrally hosted service, like Maven Central for Java or the NPM registry for JavaScript. Instead, they share projects via their source code repositories. The go install command takes an argument, which is the location of the source code repository of the project you want to install, followed by an @ and the version of the tool you want (if you just want to get the latest version, use @latest) then downloads, compiles, and installs the tool into your $GOPATH/bin directory.
2️⃣ Few examples of useful Tools
1. Hey for HTTP Response- There’s a great Go tool called hey that load tests HTTP servers. You can point it at the website url of your choice or an application that you’ve written. Here’s how to install hey with the go install command:
go install github.com/rakyll/hey@latest
Note: If you have already installed the tool and want to update it to newer version. rerun the go install command with @latest
output:
go: downloading github.com/rakyll/hey v0.1.4
go: downloading golang.org/x/net v0.0.0-20181017193950-04a2e542c03f
go: downloading golang.org/x/text v0.3.0
This downloads hey and all of its dependencies, builds the program, and installs the binary in your $GOPATH/bin directory.
We have built and installed hey, Now its time to run:
hey https://blogs.decodegeek.co.in
Output:
Summary:
  Total:        1.3027 secs
  Slowest:      0.7580 secs
  Fastest:      0.0418 secs
  Average:      0.2440 secs
  Requests/sec: 153.5319


Response time histogram:
  0.042 [1]     |
  0.113 [142]   |■■■■■■■■■■■■■■■■■■■■■■■■■■■■■■■■■■■■■■■■
  0.185 [0]     |
  0.257 [0]     |
  0.328 [2]     |■
  0.400 [4]     |■
  0.472 [1]     |
  0.543 [0]     |
  0.615 [0]     |
  0.686 [0]     |
  0.758 [50]    |■■■■■■■■■■■■■■


Latency distribution:
  10% in 0.0494 secs
  25% in 0.0548 secs
  50% in 0.0670 secs
  75% in 0.7360 secs
  90% in 0.7532 secs
  95% in 0.7536 secs
  99% in 0.7576 secs

Details (average, fastest, slowest):
  DNS+dialup:   0.1265 secs, 0.0418 secs, 0.7580 secs
  DNS-lookup:   0.0917 secs, 0.0000 secs, 0.3684 secs
  req write:    0.0000 secs, 0.0000 secs, 0.0005 secs
  resp wait:    0.1170 secs, 0.0409 secs, 0.4264 secs
  resp read:    0.0004 secs, 0.0001 secs, 0.0103 secs

Status code distribution:
  [200] 200 responses
2. Formatting your code (fmt vs goimports) - One of the main design goals for Go was to create a language that allowed you to
write code efficiently. This meant having simple syntax and a fast compiler. Most of us have wasted most of out time on formatting codes in other languages.
Since Go defines a standard way of formatting code, Go developers avoid arguments over One True Brace Style and Tabs vs. Spaces,
For example, Go programs use tabs to indent.
Go fmt - The Go development tools include a command - go fmt, which automatically reformats your code to match the standard format. It does things like fixing up the white‐
space for indentation, lining up the fields in a struct, and making sure there is proper spacing around operators.
Goimports - There is an enhanced version of go fmt available called goimports that also cleans up your import statements. It puts them in alphabetical order, removes unused imports,
and attempts to guess any unspecified imports. Its guesses are sometimes inaccurate, so you should insert imports yourself.
download goimports:
go install golang.org/x/tools/cmd/goimports@latest
To run goimports accross project:
goimports -l -w .
Note: The -l flag tells goimports to print the files with incorrect formatting to the console. The -w flag tells goimports to modify the files in-place. The . specifies the files to be scanned: everything in the current directory and all of its subdirectories.
if any unwanted declarations have been made in the code, then we receive similar to below.
Output:
err:
hello.go:62:1: expected declaration, found hj
3. Linting and Venting -
While go fmt ensures your code is formatted correctly, it’s just the first step in ensuring that your code is idiomatic and of high quality.
There are tools that help to enforce this style. The first is called golint.
Golint - Some of the changes it suggests include properly naming variables, formatting error messages, and placing comments
on public methods and types. These aren’t errors; they don’t keep your programs from compiling or make your program run incorrectly.
at the time of writing this post, i found that the golint tool is depricated and currently there is no drop-in replacement available.
Go lint package link and screenshot for more reference.
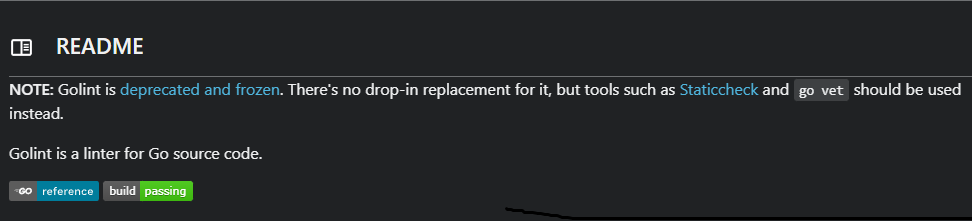
As you can see above screenshot, the go vet is another tool, which may not be the exact replacement of the golint.
Go vet - The code is syntactically valid, but there are mistakes that are not what you meant to do. This includes things like passing the wrong number of parameters to formatting methods or assigning values to variables that are never used. The go tool includes a command called go vet to detect these kinds of errors. There is no need to install go vet, it exist by default.
// To run go vet to entier project
go vet ./...
Output: To produce error for this example i have just defined “var a = strings.Builder” in main.go file but not used, so it produces the error as below.
vet.exe: .\hello.go:11:9: strings.Builder (type) is not an expression
Note: There are additional third-party tools to check code style and scan for potential bugs. However, running multiple tools over your code slows down the build because each tool spends time scanning the source code for itself.
Rather than use separate tools, you can run multiple tools together with golangci-lint.
golangci-lint - It combines golint, go vet, and an ever-increasing set of other code quality tools. Once it is installed, you run golangci-lint with the command:
golangci-lint run
3️⃣ Conclusion
Make go vet or golangci-lint part of your development process to avoid common bugs and nonidiomatic code.
Note: I recommend you to start with go vet and include golangci-lint, because golangci-lint runs 10 different linters by default, so it’s inevitable that your team may disagree with some of its suggestions. you can configure which linters are enabled and which files they analyze by including a file named .golangci.yml at the root of your project. Check out the documentation for the file format.
Hope these tips help you out in writing more efficient Go, I will post my next topic on how to automate the build for Go including all these tools in the build. 😇